Showing posts with label Picture Frames. Show all posts

Friday, September 28, 2012

Hybrid Hand Print Tree- MDS Blog Hop

Welcome to the MDS Blog Hop! This week we supposed to copy a favorite layout from Pinterest.  Mine isn't exactly a layout, but I did copy it from Pinterest.  

Here is my project:


I saw this pin when I was looking for ideas on what to give my husband for his first fathers day and knew I could recreate it in MDS, so I did!  I used the trunk from the Sweetly Nested Framable Art kit, added by text and printed it out onto a piece of 8 1/2" x 11" Whisper White cardctock.  Then came the messy part...the hand prints!  I used my then 5 month old daughters hands and SU!'s classic ink.

(**Advise...print out a few copies of the trunk so when you are doing the hand print and your kid's hand decides it wants to slide across the page when you don't want it to, you will have another fresh trunk ready to go!  I also taped the cardstock to the counter top and put my daughter in the BabyBjorn so I could have both of my hands free to guide her hands where I wanted them to go).
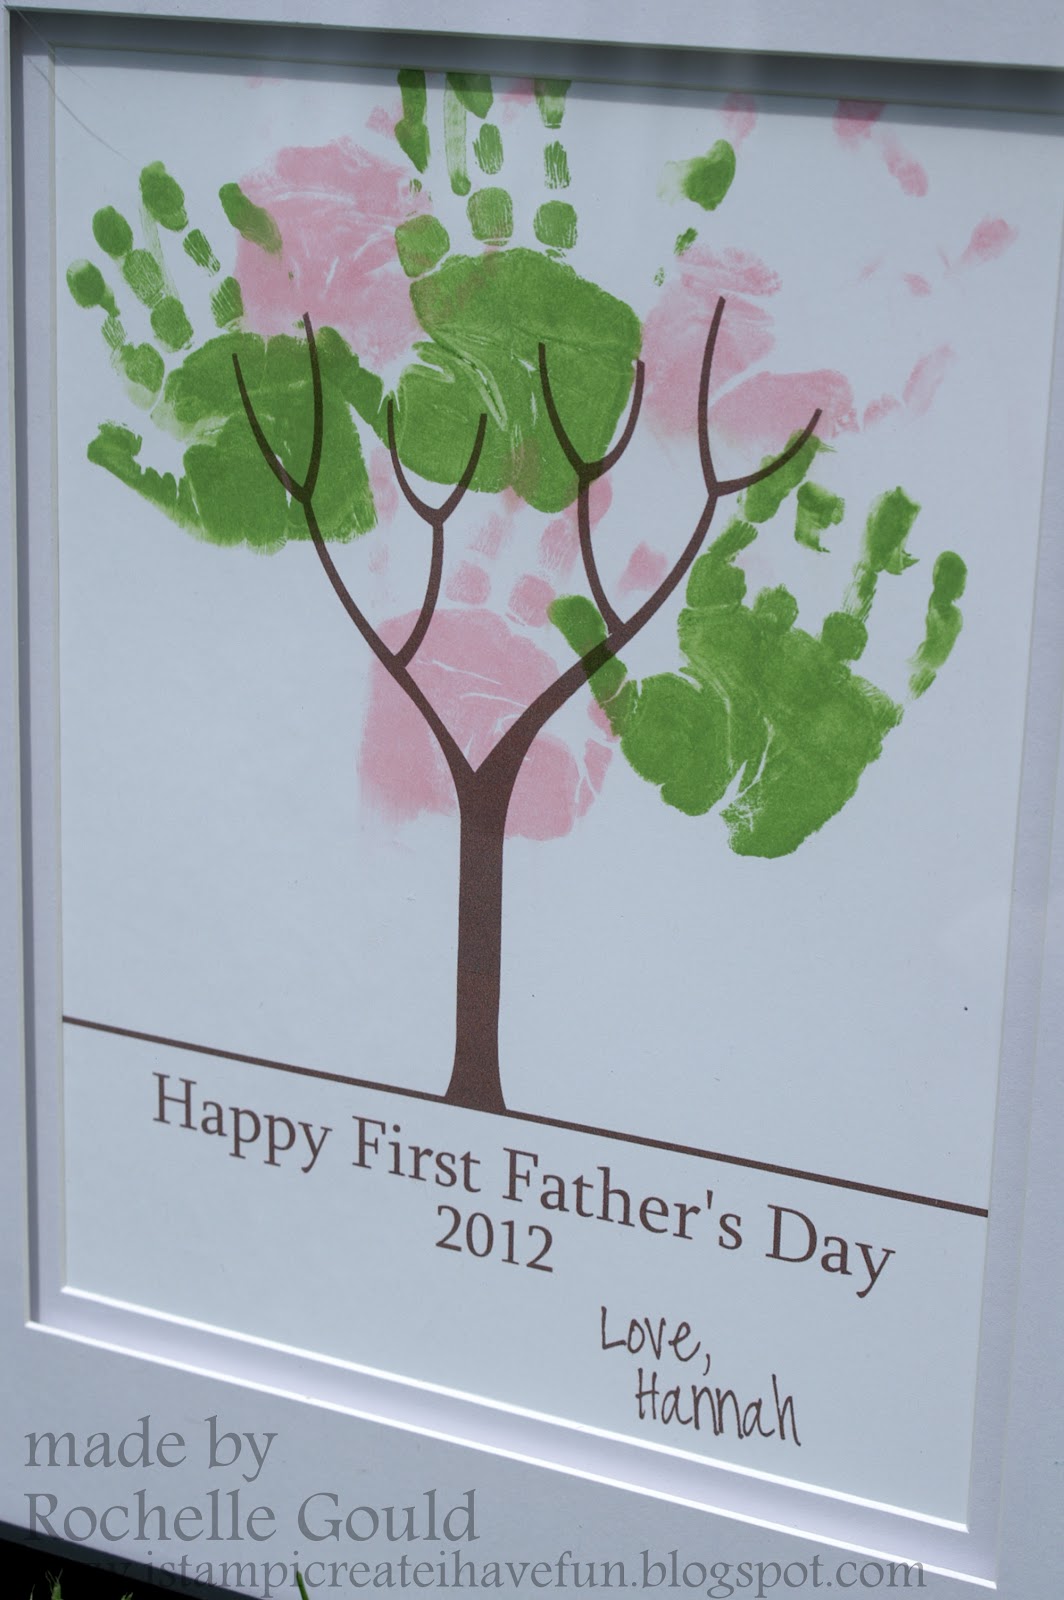

Here is a close up of the tree inside the frame.  I didn't have to spend any new money on anything for this project and I think it is a gift that we will treasure forever! I really like the way this hybrid project came out.  I think my husband liked it too!


Are you ready to hop on over to the next blog? The easiest way to do so is to click on the name right below mine, so that would be Mandy and then from her blog hop on over to Julie's blog and so on until you have hopped a full circle back to here!


Monday, January 17, 2011

Love You Frame

This frame features some of the Love Impressions Rub-Ons from the new Occasions Mini. I do not use rub-ons very often, but I really did love using them on this project!

I used a picture of my sister and her husband on their wedding day and added a few rub-ons and a fun multi-layered picture frame. It is hard to see the layers here, but you can see them in real life way better! (click on the picture to make it bigger.)

Do you want to see some cute projects and get FREE tutorials using the valentine's day themed products from the new mini? If so you NEED to check out the Create with Connie and Mary blog soon...the preview period is going on now for the upcoming Occasions Mini Edition!

During the Preview period we will be offering a special subscription rate of $24.95 for 5 weeks of daily ideas using the stamps and products in the Occasions and Sale-A-Bration Mini Catalogs! This is $5 off the regular 5 week price of $29.95. Early Bird Pricing ends Saturday, January 22nd at 11 pm EST! So DON'T DELAY!

What do you get for your subscription fee? You get a new project EVERY DAY Sunday through Friday (with at LEAST TWO FULL TUTORIALS EACH WEEK) and a fun challenge on Saturday to join (and have the opportunity to win prizes at the end of the 5 weeks). For those projects not having a full tutorial, we provide you with an easy to download and print project sheet! WHAT A DEAL!

Thanks for looking!

Wednesday, August 11, 2010

Embellished Chunky Mirror- Artisan Award Submissions 2010


Here is another one of my 3D items I made for Stampin' Up!'s Artisan Award. I really loved this one!! It is the 12x12 Chunky Frame embellished to be a mirror!

It uses the Chunky Frame, Wood Sheets, Stencils, embossing, paper, ribbon, Pretties Kit (now retired), Big Shot dies and a Simply Adored Charm all from SU!.

I "stained" the wood sheets using a few classic ink re-inkers and water as my stain and a sponge as my brush.

I used the stencil as a template to emboss the frame to give it a pattern, more interest and dimension.

I made a few paper flowers using the scalloped circle die and the sewing machine to accent two of the corners of the frame. I also added a few half pearls to the flowers from the Pretties Kit.

The Simply Adored Charm hangs off a small Chocolate Chip Satin bow and a pin from the Pretties Kit.


Thanks for looking!

Monday, December 22, 2008

Christmas Shadow


This is a shadow box that I made using a SU Decore Element. It was sooo easy to make and didn't take much time at all!

The Decore Element is in Chocolate Chip and the paper behind it is the Riding Hood Red prints pack from the current catalog.


This picture show the "shadow" better. These kinds of shadow boxes are all over Splitcoat, and a lot of them have things in the shadow box, but I decided to leave mine empty.


Thanks for looking!

Tuesday, October 14, 2008

Multi Layered Glass Frame

This is a picture frame that I made. The frame is one of those that has multiple pieces of glass layered, so you can create a layered look with pictures. I chose to use one picture and some chipboard letters.


I thought that "love" was a good word choice for this frame. I covered the chipboard letters in white craft ink, so that they would become white and stand out on the black and white photo of my husband and I on our wedding day.

Since this frame has multiple layers of glass, I thought I would use them all. As you can see from this close up photo, I put the "l", "v" and "e" on the top layer and put the "O" on the layer behind that. The picture is then on the farthest layer back. I used mini glue dots to adhere the letters to the glass.

This was a simple and fast project, but I think adding the word "love"really made this an extra special frame and finished it off well.

Thursday, September 11, 2008

Framed

If you have looked through the new catalog, I am sure you will know where I got my inspiration from for this frame. As soon as I saw that picture frame (pg 161) in the catalog, I new I was going to make one like it, so I did! I found the picture frame I used at a discount store on sale. I then brought it home and distressed it a little bit with a sanding block (you probably can't see it too much in the picture). Then came the hard part, what colors to use. I came up with Chocolate Chip, Old Olive, Pink Pirouette, Baja Breeze and a little Riding Hood Red for some accents.


I made each little square a little different and had fun experimenting with each of them! I used punches, felt flowers, brads, mini library clips, buttons, sponges, ribbon, paper piercer, stamps, ink and paper. (I only used accessories, designer series paper (DSP), and the colors that are available in the new catalog.) I purposely put each square on a little crooked, because I knew I couldn't put them all straight in a row!


I thought the stamp "happiness always" was a good sentiment to put in the middle, because that what stamping is to me! :)


In this picture you can see a few of the little squares and some of the details of them. I really had fun with this frame!

(If you have any questions of what exactly I used, let me know!)