Showing posts with label Challenge Uploads. Show all posts

Tuesday, August 2, 2011

Lucky Limade Grass-My Digital Studio- cqc96


It's Tuesday and that means I made a scrapbook page using My Digital Studio with this week's colourQ colors! If you want more info on this fabulous program...let me know! And if you think you are not a digital scapbooker...there are WAY more things to do with this fabulous program that to scrapbook!

(Click on the page to see it bigger and to see all the little details!)

This week we have some refreshing colors to work with and I found these amazing-ly perfect pictures that my cousin took of her nephew to use with them! The colors are Tempting Turquoise, Bashful Blue, Lucky Limeade (brand new color!!!), Basic Gray and White. The font I used was CAC Pinafore.

We would love for you to play along with us this week! Need some inspiration? Make sure to check out the design team members projects on the colourQ site too!

Thanks for looking!

Thursday, May 5, 2011

Bunch of Bold Blossoms- SCIC50


It's Thursday and that means time for another Stampin' Celebration Inspiration Challenge! This week we celebrating bright fun colors!

We would love to have you join us! All you need to do it look at the inspiration picture, make something that the picture inspired you to make and then upload if to the Stampin' Celebration blog!

This week I also used the sketch from Create with Connie and Mary to get me started. Speaking of Create with Connie and Mary...you need to make sure you are stopping by their site frequently the next two weeks for some FREE tutorials and BLOG CANDY!!

Here is what I came up with. I used a stamp set from the Summer Mini called Bold Blossom and got the colors for the flowers from the inspiration pictures.

The colors I used for the flowers were Rich Razzleberry, Daffodil Delight, Cherry Cobbler and Marina Mist. The card base is Pear Pizzazz and the accent panel is Daffodil Delight.
Here is a close up of the flowers. You can see I popped them up using dimentionals. I also put the greeting on dimentionals too. I finished off the card by tying a piece of 5/8" Whisper White grosgrain ribbon around the accent panel.

I hope you can participate in either one of the challenges this week!

Thanks for looking!

Click here to order Stampin' Up! supplies 24/7! and don't forget the Summer Mini is now available to order from too!

Tuesday, February 15, 2011

Lots of Love...-cQc#72

It's time for another digital scrapbook page...yippe!! This week Arielle over at the colourQ had some challenging colors for me to use for a scrapbook page, but I guess that is why it is called a "challenge" right?? (click on the picture to view it larger)

The colors for this week are Cherry Cobbler, Not Quite Navy, Baja Breeze, Tangerine Tango (challenging color for me!!) White and Crumb Cake/Kraft.

I knew this week I wanted to use a picture of my husband and I, this week will be our 4th wedding anniversary :), but didn't realize how hard it would be to find a picture of us that went with these colors! I had to dig deep and found this picture of us in 2006...before we were even married!

I was having a hard time finding anything Tangerine Tango to use, besides normal card stock, until I found Tangerine Tango in the Stitches DSP from the Sew Sweet paper pack in My Digital Studio and cropped all the other colored stitches out and just used the Tangerine Tango ones!

I do like the way this page finally came out! (you do not want to know how many layouts and element changes I went through to get my final page...)


Thanks for looking!
I hope to see your creation over at the colourQ blog this week too!


Click here to order Stampin' Up! supplies 24/7! remember for every $50 you spend you get to choose a FREE Sale-A-Bration product from the SAB catalog!

Friday, February 11, 2011

Simply in Pink - cQc#71

This week's colourQ color challenge is so pretty I just had to make a card using the colors!

I was thinking the other day I haven't even used the cute little love kid in the Greeting Card Kids stamp set yet, so I pulled out the colors and the stamp set and here is what I came up with!


I just love coloring these little Greeting Card Kids on Stampin' Up's watercoor paper using my blender pens and the different classic ink colors that I need!

Very simple, but super cute I think!


Recipie:
Stamps: Greeting Card Kids, Teeny Tiny Wishes.
Paper: Crumb Cake card stock and water color paper.
Ink: Black StazOn, Pretty in Pink, Blushing Bride, Pink Pirouette, Crumb Cake.
Accessories: Very Vanilla Seam binding ribbon, blender pens, corner rounder punch.


Thanks for looking!

Click here to order Stampin' Up! supplies 24/7! remember for every $50 you spend you get to choose a FREE Sale-A-Bration product from the SAB catalog!

Thursday, February 3, 2011

Simply Sophisticated Valentine- SCIC#38


It's Thursday and that means time for a Stampin' Celebration Inspiration Challenge! This week we are inspired by the bold red, black and white in these photos.

Feel inspired? We would love to see what you create using these photo's as inspiration by uploading your project to the Stampin' Celebration blog here!

Here is what I made, a simply sophisticated valentine! With the clean and simple lines this card has, it would be a perfect masculine card (even thought it has some of the new Red Glimmer paper on it!)

If you haven't had a chance to get your hands on any of that glimmer paper, you need to....it is awesome! It gives your project that glittery look and feel without actual glitter getting all over everything everywhere!

Recipe:

Stamps: Teeny Tiny Wishes
Paper: Very Vanilla, textured Basic Black, First Edition DSP and Red Glimmer paper
Accessories: Big Shot, Perfect Polka-Dots embossing folder, Full Heart extra large punch.


Thanks for looking!

Click here to order Stampin' Up! supplies 24/7! remember for every $50 you spend you get to choose a FREE Sale-A-Bration product from the SAB catalog!

Tuesday, February 1, 2011

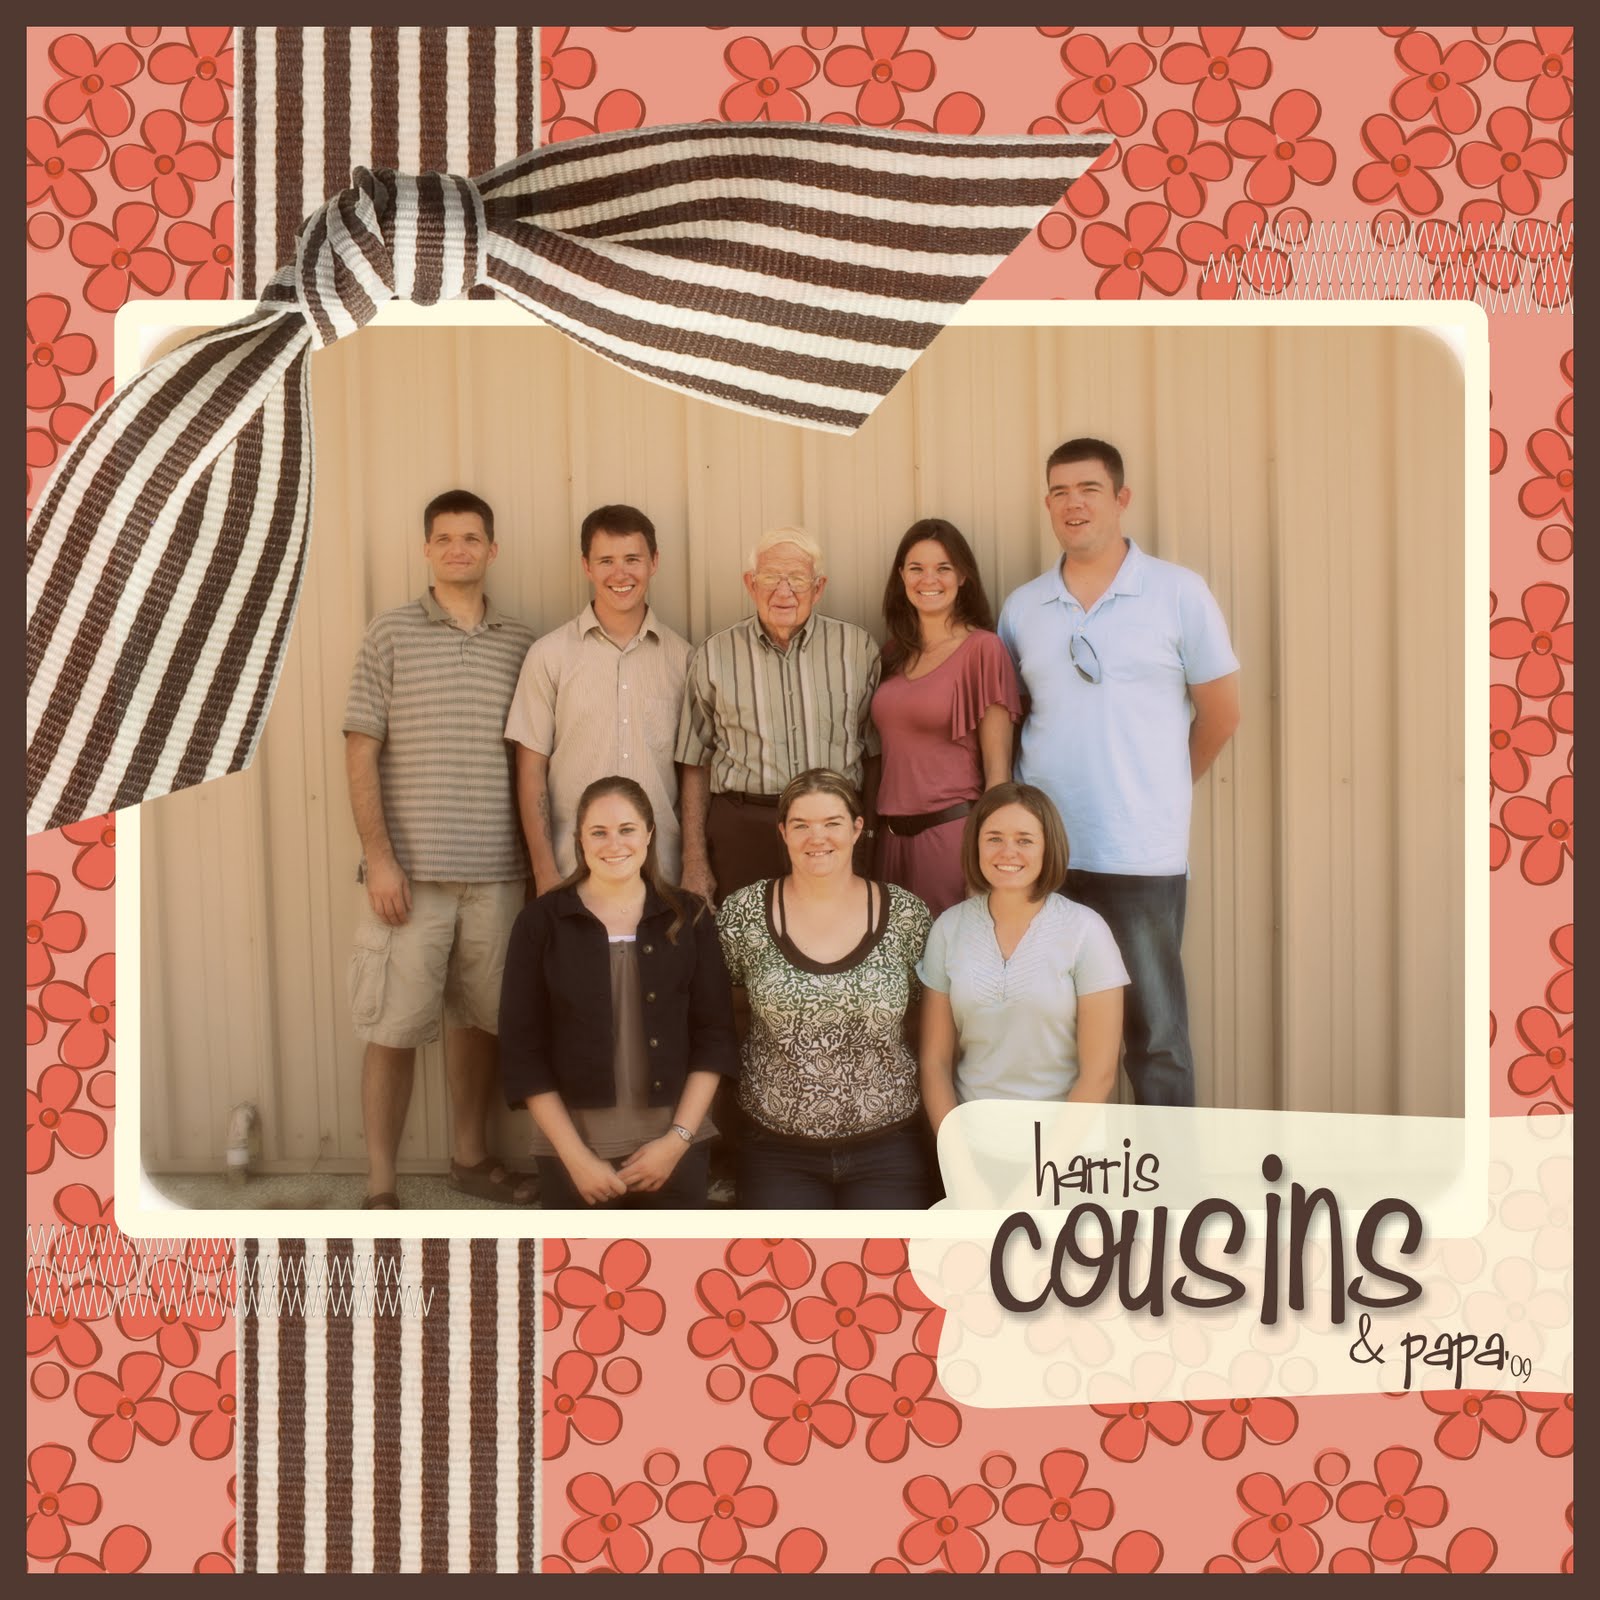
Cousins & Papa page- cQc#70


It's time for another digital scrapbook page! :) Arielle has some great colors this week for the colourQ color challenge #70. They are Poppy Parade, Cameo Coral, Blushing Bride, Early Espresso and Very Vanilla.

I have to admit, I had a HARD time finding a picture that I liked with these colors, but I finally found one that would work and then made it even better by messing with the color a little bit using Picnik!

Here it is...my "Harris Cousins & Papa" page! I made my own DSP using one of the images from the Sale-A-Bration stamp set Sweet Summer stamped over and over again in a pattern and then"colored" it in using small punched circles with the colors from this week....yes a little bit of work, but I think it was totally worth it!

(Click on the page to view it bigger!)

Thanks for looking!
I hope to see your creation over at the colourQ blog this week too!

Saturday, January 29, 2011

Dressed-up Paper Bag Favor- CCMC-OM1

Wow has it been an AMAZING week one over at the Create with Connie and Mary Occasions Mini Edition! We have been creating using all the "Bring on the Cake Suite" things from the mini and let me tell you...there have been some SUPER cute and some one of a kind projects made using these products! Do I have you interested yet? Do you want to see what I am talking about? I bet you do! It is never to late to join the Create with Connie and Mary Occasions Mini Edition. Click here to find out how to subscribe and get in on all the fun!

It is time for the Create with Connie and Mary Occasions Mini Edition Saturday Challenge...week one we are making party favors using the "Bring on the Cake Suite" products! What perfect products to make a party favor!

Here is what I made, a dressed-up paper bag party favor! I started with a plain old paper bag (you can use any size you want) and stamped the number image from the Bring on the Cake stamp set. Then I measured the circumference around the bottom of the bag and then cut the Cherry Cobble card stock to that size and then cut slits in it to give it some interest. I then adhered it to the bag using sticky strip.

I used a few little strips of acetate to mount a few small paper stars to the bag so it looks like they are flying up behind the cupcake.

The cupcake was made using the new Create a Cupcake punch from the Occasions Mini Catalog using Daffodil Delight and Basic Black card stock and was mounted onto a 1 3/4" circle Naturals White card stock using dimensionals.

Change the color scheme and you would have a super cute party favor for a girl's birthday, or baby shower or wedding! So many options for this cute little favor!

The Saturday challenges are for our subscribers to play along with us! When they enter the challenges, they have their name put in the drawing for one of two $75 merchandise certificates and one of two FREE subscriptions to Create with Connie and Mary SUMMER Editon. The more they enter the challenges, the more times their name is entered into the drawing! You can subscribe here!

Be sure to head over to the Create with Connie and Mary site to check out the other Design Team Members party favors and their blogs as well!

Oh....I also heard there is a FREE tutorial for one of the projects over on their blog as well as a bonus this week!!


Thanks for looking!
and I hope to see you over on the Create with Connie and Mary site soon!

Tuesday, January 18, 2011

what else do you need? cQc#68

Today I am beginning a new adventure.....posting Digital Scrapbook pages (using only Stampin' Up!'s digital crafting option, My Digital Studio) ! I tried out for the colourQ Scrapbook team (see this post) and then got a position on the colourQ Scrapbook Design Team! I am super excited because this is a great excuse (isn't it bad I have to call it that?) to start scrapbooking again! I will design a page every other week for the colourQ challenge.

I would suggest you taking a peek at the colourQ challenge blog and playing along when you can! You do not have to scrapbook, you just have to create something using the colors Arielle has picked for that week!

Ok, so onto this week's colourQ challenge! Look at these warm rich colors Arielle has picked for us this week! They are Cherry Cobbler, Poppy Parade, So Saffron, Always Artichoke and white.

My husband loves to fly fish and I had a great picture of him showing off one of his catches, so I decided to use it with these colors and it worked out perfectly! (click on the picture to make it bigger!)

I used multiple layers and elements on this pages, including Vintage Overlays, Stamps, text and embellishments.

I hope you have a chance to check out the colourQ challenge this week! We would love to see you there!

Thanks for looking!

And don't forget...you must check out the Create with Connie and Mary blog too! The preview period (aka FREE tutorials for awesome projects) is in full swing and you do not want to miss out!!

Thursday, December 9, 2010

Dazzling Snowman Ornament- SCIC31


It's Thursday and that means time for another Stampin' Celebration Challenge! This week we have some non-traditional Christmas colors to work with. I saw the inspiration pictures and knew whatever I made was going to have pink on it and be sparkly!

Here is what I made, a snowman ornament! I used a few glass ball ornaments and added dazzling diamonds to them and then hot glued them together in a snowman shape. I added a few big buttons from the Holiday mini catalog, a handmade scarf (I sewed a few pieces of ribbon together) and made a top hat for him (or her) and it was done!

The snowman is going to glimmer very nicely when the dazzling diamonds catch the light off the Christmas tree!

Thanks for looking!
and I hope I inspired you to create something!

Thursday, December 2, 2010

Snowflake Frost- SCIC30


It's Thursday and that means it is time for another Stampin' Celebration Inspiration Challenge! This week we have these elegant inspiration pictures to work with. Look at all that glitter and glam in the pictures! We would love for you to play along with us! Just stop by the Stampin' Celebration blog and link your creation!

When I saw these pictures, they gave me a frosty-wintery feeling, so I decided to go with the sparkly snowflake theme! Here is what I came up with! (glitter and shimmery things are soo hard to take pictures of...anyone have any recommendations?)

The colors I used on my card are Whisper White, Brushed Silver, Rich Razzleberry, Perfect Plum, Elegant Eggplant and Concord Crush. I die cut the snowflakes from the Merry Details Sizzlit die in all four of the purples. Then I used the Frost White Shimmer paint and lightly sponged all the snowflakes and any Whisper White card stock on the front of my card. The snowflakes are held together using a brad that I dipped into Tombow adhesive and then dipped into the Silver Glass Glitter.

The snowflakes are mounted on to 1 1/2" squares of Brushed Silver card stock that I added Silver Glass Glitter to each of the sides using the Tombow adhesive. The sentiment comes from the Curly Cute stamp set.

I mounted the snowflake panel on to a piece of Vellum card stock that I crumpled up in my hands to give it an icy-cold look.

Really this card did not take all that long to create, even though it look like it would be!

Thanks for looking!
and I hope I inspired you to create something too!

Saturday, November 20, 2010

Pretty Packaging- CCMC-HM8

It's week 8 over at the Create with Connie and Mary Holiday Edition and that means that last week :( and that means this is the last Saturday Challenge for me too. I have really enjoyed my time as a Guest Designer for their Holiday Edition. Thanks to Connie and Mary for asking me to be apart of their Design Team. If you have not checked out their blog, do so now!

This week we have been creating using the Tags will Christmas, Calendar Kit, Jolly Jingles, Designer Fabric and the level 2 hostess Peaceful Seasons stamp set and the Saturday Challenge is for the Design Team only this week is Pretty Packaging.

Here is what I made, my own wrapping paper using the Tags till Christmas stamp set! I stamped my images on Kraft Paper (you know the stuff that comes in a roll like wrapping paper but is not pretty until you make it that way!) and then tied it up using some raffia and added a stamped tag to to package.

I used Cherry Cobbler, Old Olive and Early Espresso ink to stamp on the Kraft paper with. I also sponged a little bit using Soft Suede ink. Making the paper really did not take that long, I was surprised how quickly it was done! Here is a picture so you can see the paper better.

Here is a close up of the tag I made for the top of the package. You can also see that I sponged the edges of the package using the Soft Suede ink. I think it gave it a vintage-y look.

Making your own wrapping paper is a very easy way to make you gift unique and impress the person who is receiving it before they even open it! Give it a try this holiday season!

Be sure to check out the other design team members "pretty packages" this week too:

Connie Babbert- Inkspired Treasures
Cristena Bagne- Gettin' Crafty
Jenn Picard- A New Ink on Life
Mary Brown- StamperCamper's Corner

Thanks for looking!

Thursday, November 18, 2010

Vanilla Pumpkins- SCIC29

It's Thursday and that means time for another Stampin' Celebration Inspiration challenge! This week we have these warm and inviting inspirational pictures. If you would like to play along, please do...we would love to have you!

Here is what I came up with! I have never made white pumpkins, but when I saw the inspiration pictures, I really liked them and thought I would give it a try! My inspiration came mostly from the top left picture, you probably can tell that!

The colors I used for my card are Soft Suede, Crumb Cake, Very Vanilla, Cherry Cobbler and More Mustard. I made the barn wood siding by stamping the wood grain background stamp onto Crumb Cake card stock using Soft Suede ink and then sponged the edges using the same ink. The pumpkins are made using the Extra Large oval for the larger pumpkin and the small oval punch from the mini catalog for the small pumpkin and then crumpled and sponged with the Crumb Cake ink. The Cherry Cobble and More Mustard leaves were cut free hand.
The greeting "Grateful" is from the set Falling Leaves.

I hope I inspired you to create with us this week!

Thanks for looking!

Saturday, November 13, 2010

Cute Gift's- CCMC-HM7

It's nearing the end of Week 7 over at the Create with Connie and Mary Holiday Edition and it is time for our Saturday Challenge! Do you want to be entered into a drawing for one of two $75 Stampin' Up! merchandise gift certificates or two FREE passes to the NEXT edition of Create with Connie and Mary? If so, then head over to the Create with Connie and Mary blog and subscribe to the Holiday Edition and play along with us in the Saturday Challenges! It is never too late to join...but you better hurry, because next week is the last week....you will have access to all the past projects and tutorials for a long time after we stop creating no matter when you join us!

Ok on with this week's Saturday Challenge! This week we have been creating using A Cute Christmas, Merry Crittermas, the Builder Wheels, Candy Cane Rub-Ons and the Decor Elements. The challenge for this week is a color challenge using Garden Green, Baja Breeze, Blushing Bride and Real Red. I decided to use the A Cute Christmas stamp set for my card.

Here is what I came up with! I had fun wrapping up all the presents on my card and even un-wrapping one of them! :) I used the Candy Cane Christmas Designer Series Fabric on my card as well as the stamp set, because I couldn't not resist using it, it matching the A Cute Christmas set perfectly!

I made my presents by cutting appropriate colors of card stock for the boxes and then wrapped them up using small strips of the Designer Series Fabric. I attatched "to: from:" tags (made using the "to: from:" stamp in the A Cute Christmas stamp set) to each gift. The last gift has already been ripped open to expose the greeting "have a cute Christmas!"

The Whisper White background on my card was sent through the Big Shot with the Perfect Polka Dots Embossing Folder and then mounted onto a Blushing Bride card base.

Be sure to check out the other design team members cute creations this week too:

Connie Babbert- Inkspired Treasures
Cristena Bagne- Gettin' Crafty
Jenn Picard- A New Ink on Life
Mary Brown- StamperCamper's Corner

Thanks for looking!

Saturday, November 6, 2010

Rudolph the Gift Card Holder- CCMC-HM6

It's nearing the end of Week 6 over at the Create with Connie and Mary Holiday Edition and it is time for our Saturday Challenge! Do you want to be entered into a drawing for one of two $75 Stampin' Up! merchandise gift certificates or two FREE passes to the NEXT edition of Create with Connie and Mary? If so, then head over to the Create with Connie and Mary blog and subscribe to the Holiday Edition and play along with us in the Saturday Challenges! It is never too late to join...you will have access to all the past projects and tutorials no matter when you join us!

This week we have been creating using the Jolly Bingo Bits, Bingo Card, Sweet Snowglobe and the Jolly Old Saint Nick stamp sets in the Holiday Mini Catalog. Our Saturday Challenge this week is a sketch challenge! As soon as I saw this sketch, I knew I was going to make a gift card holder!

My gift card holder measures 2 1/2" x 3 3/4". The colors I used were Crumb Cake, Whisper White, Cherry Cobbler, Early Espresso and Wild Wasbai.

I used the reindeer stamp in the Jolly Bingo Bits stamp set as a template for my reindeer on my gift card holder. Here is how: I stamped him using Early Espresso ink onto Early Espresso card stock and then cut out his head. Then I used the Extra Large Snowflake punch to give him some bigger antlers that would tie into the sketch this week.

The sentiment is from the Fabulous Phrases stamp set and was simply stamped on to Whisper White card stock and then cut out and glued to the Crumb Cake card stock.

I finished off the gift card holder by tying a piece of the 1/2" Cherry Cobbler Seam binding around the whole thing to create a closure.

Be sure to check out the other design team members creations this week using this fun sketch too:

Connie Babbert- Inkspired Treasures
Cristena Bagne- Gettin' Crafty
Jenn Picard- A New Ink on Life
Mary Brown- StamperCamper's Corner

Thanks for looking!

Friday, November 5, 2010

Field of Flowers- SCIC27


It is time for another Stampin' Celebration Inspiration Challenge! This week we are celebrating fall weddings! Feel free to join us this week by making a card or project inspired by our photos this week and upload it over at the Stampin' Celebration blog! We would love for you to join us!

Here is what I came up with! The colors I used were Very Vanilla, Bravo Burgundy, Pumpkin Pie, Certainly Celery, and Blushing Bride.

This card was really pretty easy to make. I took the Itty Bitty Shapes punch pack and used the flower shape and punched out the card stock colors I wanted and then crumpled them up and stuck them to a piece of card stock that was covered in the sticky pages. Then I took a few small pearls and put them in the middle of all the Certainly Celery flowers.
I textured the Very Vanilla background using my Big Shot. I finished off the card by added a Very Vanilla Satin ribbon and a greeting from the Tiny Tags stamp set and the Tag punch.

Thanks for looking!
I hope I inspired you to play with us this week!

Saturday, October 30, 2010

Frosted- CCMC-HM5

This week over at the Create with Connie and Mary Holiday Edition we have been creating using the Angelic Joy, Rejoicing in Christmas, Fireside Christmas and Northern Hearts (hostess) stamp sets and for the Saturday Challenge this week the theme is All the Glitters!

I decided to use the Northern Hearts stamp sets and focus on the snowflakes in the set, because snowflakes are always glittlery! Here is what I came up with, Frosted. I do not use glitter very often, but had fun making my card fit the theme All that Glitters!

I started by stamping all three different snowflakes from the set onto Whisper White card stock using Versa Mark ink and then embossed them using a mixture of half Clear Embossing powder and half Dazzling diamonds. In real life this gives the snowflakes a real glittery look.

The bird and the leaves were punched out using the Two Step Extra Large Bird punch. Then I covered them in Multipurpose TomBow Adhesive and sprinkled the Silver Glass Glitter over them. (The TomBow Adhesive works GREAT to make the Glass Glitter stick to anything!)

The sentiment, from the Curly Cute stamp set, was stamped onto Whisper White card stock and then mounted onto Vellum card stock and given a little dimension using the bone folder.

I added a little White Satin Ribbon to finish the card off!

Do you want to play along this week with us? Head over to the Create with Connie and Mary blog and subscribe to the Holiday Edition and play along with us and when you do you will be entered into a drawing for one of two $75 Stampin' Up! merchandise gift certificates or two FREE passes to the NEXT edition of Create with Connie and Mary. It is never too late to join...you will have access to all the past projects and tutorials no matter when you join us!

Be sure to check out the other Design Team Members Glittery creations this week too:

Connie Babbert- Inkspired Treasures
Cristena Bagne- Gettin' Crafty
Jenn Picard- A New Ink on Life
Mary Brown- StamperCamper's Corner


Thanks for looking!

Thursday, October 28, 2010

Bright Flowers- SCIC26


It's Thursday and that means it is time for another Stampin' Celebration Inspiration Challenge! This week we are celebrating sweets in all shapes, sizes and colors! Look at all the bright fun colors in all those candies and I was inspired by just that...all the fun bright colors this week!

Here is what I came up with, Bright Flowers! I LOVE water coloring and these flowers from the stamp set Awash with Flowers is always a fun one to color! I chose to use only colors from the Brights Collection on my card this week to match the colors of the candies in the inspiration pictures. The colors I used were Real Red, Rich Razzleberry, Tempting Turquoise, Pumpkin Pie and Old Olive.

I started off by stamping the outlines if the flowers onto Water Color paper using Black StazOn ink and masking a little bit to make the flowers look like they were overlapping. Then I took the markers in the colors I used and added color to the flowers and used my blender pens to color them in.

I added the sentiment from Curly Cute on a wavy banner then mounted it to the main image and mounted that onto a Very Vanilla card base and the card was done!

Be sure to check out the other design team members creations too and I hope I inspired you to join us this week!

Thanks for looking!

Thursday, October 21, 2010

Towering Trio of Sweet Treats- SCIC25

It's Thursday and that means it is time for another Stampin' Celebration Inspiration Challenge! This week we are celebrating spiders, pumpkins, bats, cats and plenty of bright fun colors! And I saw an awfully lot of sweet treats in the inspiration pictures too!

Here is what I came up with, a Towering Trio of Sweet Treats! I used Certainly Celery, Perfect Plum, Pumpkin Pie and Basic Black as my color scheme.

I die cut the boxes from the Bitty Box and Envelope die with my Big Shot and then used the Batty for You stamp set to stamp the images using the same color ink as the card stock. Then I filled the boxes with some sweet treats for a special trick-or-treat-er!

I stacked them all together and tied them up using the Basic Black 1/8" Taffeta Ribbon. I added a simple tag to the top by using the Batty for you stamp set, Basic Black ink and the 1 1/4" and 1 3/8" circle punches.

A simple yet fun project to make treats extra cute for extra cute trick-or-treat-ers!

Be sure to check out the other design team members projects this week too over at the Stampin' Celebrations blog and I hope I inspired you to join us this week!

Thanks for looking!

Saturday, October 16, 2010

So Sweet Candle- CCMC-HM3

It's Week 3 over at the Create with Connie and Mary Holiday Edition! This week we have been been "building" the Design-a-House's from the Holiday Mini and they are SOO much fun to design, create and build! I wish I could show you mine, but I can't here, so if you want to see it then you will have to be a subscriber to the Create with Connie and Mary Holiday Edition.

Since we are "building" houses this week our Saturday Challenge was to make a small hostess gift. Here is what I came up with, a So Sweet Candle!

I took a cheap white candle (about 3 inches in diameter and height) and gave it a cute belly band decorated with gumdrops and peppermint candies that I made! The actual belly band are "Graham Crackers" that I made from paper. (hint hint...if you like this, you will LOVE my house...what are you waiting for...go subscribe!) The tag was made by punching out Crumb Cake card stock using the Decorative Label punch and then adhering the "So Sweet" sentiment that I die cut using the Timeless Type Junior Alphabet and my Big Shot.

Here is a closeup of the candies. I used the Large Oval punch to get the Gumdrop shapes which I punched out of the colored card stock that I embossed using a sparkly mix of clear embossing powder and Dazzling Diamonds. I put the candies on the Graham Cracker using dimensionals.

Be sue to check out the other Design Team members small hostess gift this week to:

Connie Babbert- Inkspired Treasures
Cristena Bagne- Gettin' Crafty
Jenn Picard- A New Ink on Life
Mary Brown- StamperCamper's Corner

Thanks for looking!

Do you want to be entered into a drawing for one of two $75 Stampin' Up! merchandise gift certificates or two FREE passes to the NEXT edition of Create with Connie and Mary? If so, then head over to the to the Holiday Edition and play along with us in the Saturday Challenges! (You must be a subscriber to play in the Saturday Challenges.)

Thursday, October 14, 2010

Textured Pumpkins- SCIC24 and SR#41


It's Thursday and that means it is time for another inspiration challenge from the Stampin' Celebration blog! This week we are celebrating pumpkins! It is getting to that time of year that pumpkins are all around us and we want to see what you are inspired to make!

Here is what I made, Textured Pumpkins. I just LOVE making these pun art pumpkins and this year I decided to give them all a little different texture using 5 of the Embossing Folders and my Big Shot. I got the idea from the picture on the top right (the rectangular shaped one) of the inspiration collage.

The colors I used were Pumpkin Pie, Very Vanilla, Old Olive, Chocolate Chip and Basic Black. I used the Extra Large Oval, Large Oval and the new Oval punch from the Holiday Mini to make the pumpkins. I sponged the pumpkins after I textured them to give them a little more depth and detail.

I added a few Basic Black bats using the Large Bitty Bat punch to finish it off.....but then I kept looking at it wondering if the bats were too much....so I took them off. Here it is. What do you think? What card do you like better? The one with the bats or the one without the bats?

Anyways, I hope I inspired you to join us this week in making a pumpkin-ish project! Be sure to check out the other design team members projects too for some more pumpkin inspiration!

Thanks for looking!

Oh, I just found out that this card meets the standards for this week's Stampin' Royalty Challenge, Spooky Kooky aka Halloween so I am entering this card in it too!