Showing posts with label Holiday's. Show all posts

Wednesday, April 10, 2013

Spring Hop- MDS Blog Hop


The MDS Blog Hop crew is back with another hop for you!!  This is or first hop of the month, so we have a theme...it is Spring!  Don't forget about our Pinterest page too!!  We have ALL of our pages and/or projects each design team member has made since we started in January pinned!!  Check it out here and make sure to follow us!


With the theme this time and it just being Easter, I made an Easter page.  Here it is:


I kept it simple.  The embellishments and DSP are from the Spring Fever kit and the doily in the back is from the kind-of-new download Paper Doilies.  I did recolor the DSP from the kit to Wisteria Wonder and changed the opacity to make it match her outfit.

Simple page, but now it is ready to go in our 2013 album!!


Are you ready to hop on over to the next blog? The easiest way to do so is to click on the thumbnail right after mine, so that would be Aly and then from her blog hop on over to Mandy's blog and so on until you have hopped a full circle back to here!  This month's guest blogger is Monika Dais, make sure to check out what she made too!


Thanks for stopping by!

Monday, March 25, 2013

Visiting Santa for the First Time- MDS Monday Challenge

It's Monday and I have some exciting news!  I was invited to me apart of the MDS Monday Design Team!  I am very excited to be apart of their team!  MDS Monday is a My Digital Studio challenge blog that posts a new sketch and usually a little challenge or technique to go with it every other Monday which makes for a fun way to try new things with MDS!

Today our hostess is Joan and she created this sketch:


Although this is a double spread, you can take the option of selecting only one of the pages to do if you like.  The bit of "technique" this week is to use a frame ON TOP OF YOUR PHOTO to highlight something within the photo.

So here is the page I made:


I went with the one page option (the page on the left) and you can see that I mirrored the sketch.  I used the Letters to Santa DSP and then used the Candid Frames kit for the frames on my page.  The font is called Irish Spaghetti.

Be sure to go by the MDS Monday blog and see what all the other DT members created.    And we would love to have you join us too...the challenge lasts two weeks, so you have time to create something in MDS and show us.  We are also going to enter you into a drawing for a free download of your choice up to $9.99 just for joining us! 


Thanks for stopping by!

Wednesday, March 13, 2013

Hip Hop, Happy Easter!- MDS Blog Hop

It's the Second Wednesday of the month and that means the MDS Blog Hop crew is back with another hop for you!!  This is our first hope of March so we have a theme..this week it is Easter or St. Patrick's day!!  Be sure and check out our NEW Pinterest page too!!  We have ALL of our pages and/or projects each design team member has made since we started in January pinned!!  Check it out here and make sure to follow us!

I was looking at Pinterest the other day and saw an Easter card that caught my eye and knew I could make it in MDS, so I did...here it is:


It is a CASE for sure!!  But I loved what I saw, I knew I didn't want to make it much different.  I used the Timeless Type punches for the "Hip Hop"'s and filled them with the Eggceptional Easter DSP.  The bunny is from the Little Additions kit and I freeformed the little hop dots. 


Are you ready to hop on over to the next blog? The easiest way to do so is to click on the thumbnail right after mine, so that would be Aly and then from her blog hop on over to Mandy's blog and so on until you have hopped a full circle back to here!  This month's guest blogger is Wendy Weixler, so make sure to check out what she has made as well! 


Thanks for stopping by and see you in 2 weeks for our mid month March hop!

Friday, December 16, 2011

Merry and Bright MDS Christmas Card- My Digital Studio Blog Hop

Welcome to the My Digital Studio Blog Hop!  For the next few weeks our theme is going to be general "Holiday" so you can see what we have been working on for the up coming Holidays!

Here is our Christmas card this year.  I CASED it from Connie Collins.  I loved the simple and crisp look of the card.  It uses the Christmas Jingle DSP and embellishments.  I did change the sentiment just a teeny tiny bit...I changed the font of "merry & bright" to match the font I used on the inside of the card.   


Here is the inside of the card.  I embellished the bottom of the card to match the front and gave the entire (including the top of the card when you open it and the back of the card) a small soft polka-dot background.  I typed my own sentiment using the font My Own Topher and added our signatures in the Digs My Heart font.


I was really pleased when I received them in the mail from the print services from Stampin' Up!


Are you ready to hop on over to the next blog? The easiest way to do so is to click on the name right below mine, so that would be Mandy and then from her blog hop on over to Julie's blog and so on until you have hopped a full circle back to here!


Friday, December 9, 2011

Full Bow Christmas Postcard- MDS Blog Hop


Welcome to the My Digital Studio Blog Hop!  For the next few weeks our theme is going to be general "Holiday" so you can see what we have been working on for the up coming Holidays!

Here is a card I CASED 98% from Julie Warnick (thanks Julie!!)  I just loved the way it looked and how it fit the feeling of the family picture one of my friends gave me to make their Christmas cards with.  I Made a few different sample cards for her and this is the one she liked the best!


The postcard is 5x7 and uses the Presto Patterns stamp set to make the background.  The bow was made using three Seam Binding ribbon bows rotated on top of each other to achieve the full bow shape and then an Antique Brad was added to the middle.


Here is the back of the postcard.  I always decorate the back of the postcards....nothing ever too crazy or complicated, just enough to finish it off.  


Are you ready to hop on over to the next blog? The easiest way to do so is to click on the name right below mine, so that would be Mandy and then from her blog hop on over to Julie's blog and so on until you have hopped a full circle back to here!


Tuesday, August 30, 2011

First Easter- cqc100


It's Tuesday and a very special one at that...it is colourQ's 100th color combo celebration!! This week we have a SKETCH and we got to pick a past colourQ color combo! I made a page using My Digital Studio and colourQ#45's colors. If you want more info on this fabulous program...let me know! And if you think you are not a digital scapbooker...there are WAY more things to do with this fabulous program that to scrapbook!

(Click on the page to see it bigger!)

As you can see I flipped the sketch. This page features my cousins little boy Alex having fun with some Easter eggs on his first Easter. This was such a fun sketch to use for a scrapbook page! How about you give it a go by making a scrapbook page or a card?!?! Head over to the colourQ site and join us...there are 99 color combos to choose from, I bet you can find one you like!

Thanks for looking!

Thursday, April 14, 2011

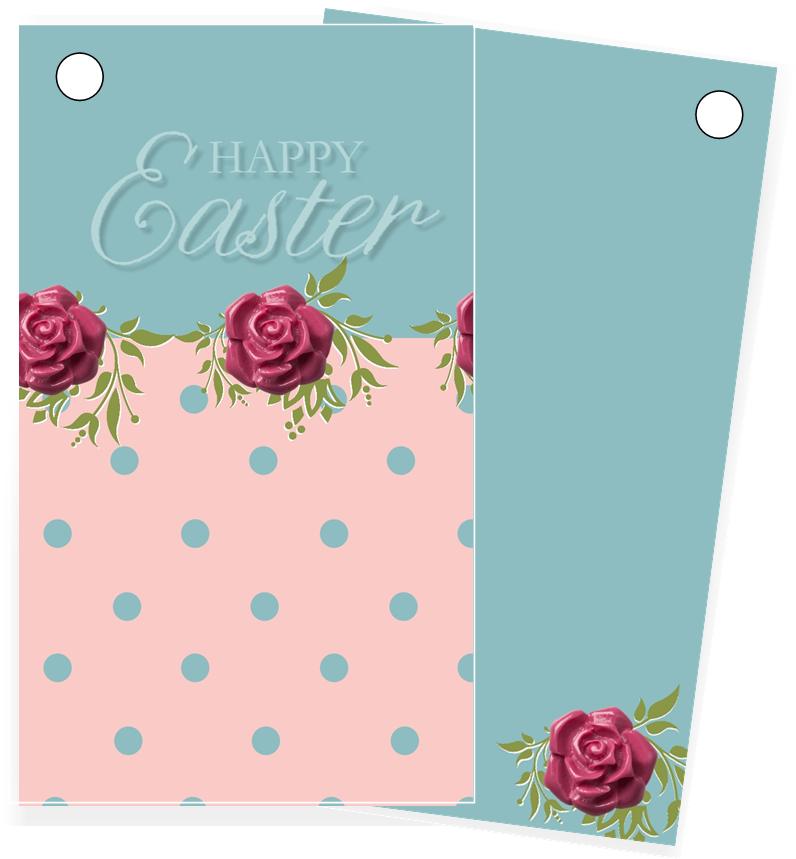
My Digital Studio- Easter Tag- SCIC48

It's Thursday and that means time for another Stampin' Celebration Inspiration Challenge! This week we are celebrating Easter (and soft pastel colors!) I decided to use My Digital Studio (MDS) and make an Easter tag this week inspired by the Baja Breeze and Pretty in Pink egg in the bottom right inspiration picture.

Here is what I came up with (front and back view)! This tag was fun and simple to create. Stampin' Up! has made it so easy to use their digital program, it is fantastic! With their newest (FREE!!) upgrade one of the templates they included was a tag.

I bet you can tell what egg I used as my inspiration! :) I used the digital Vintage Adornments and the Easter Blossoms stamp set to make my tag.

I hope I have inspired you to create something with us this week and if I haven't then the other design team members will defiantly do so! Drop by the Stampin' Celebration blog to see their creations....you never know, you may be our next "Party Guest" designer!

Thanks for looking!

Click here to order Stampin' Up! supplies 24/7!

Thursday, March 3, 2011

My Digital Studio-got green?-SCIC42

It's Thursday and that means time for another Stampin' Celebration Inspiration challenge! This week we are celebrating shamrocks, shamrocks and more shamrocks! Plus green, green and more green! We hope you decide to celebrate with us this week!

This week I decided to make a digital St. Patrick's day card since in two weeks today the recipient should have it in their hands!

The green's I used on my card are Old Olive, Certainly Celery, Pear Pizzazz and Always Artichoke. This card came together pretty fast once I saw the close up inspiration picture of the layered shamrock.

I just used the shamrock from the Sale-a-Bration stamp set So Happy for You on the Digital Content CD, a button, a little ribbon and then added the grid background of the card and changed the opacity of it and added a Vintage Overlay on top of that.

I got the idea from the sentiment on the front of the card from the stamp set Got Treats.

Here is the inside of the card. You can see I carried the background from the front of the card to the entire inside. I added a cute little sentiment on the inside that I felt went very well with the front! What do you think? Cute?

I hope I inspired you to create something green this week with us!

Thanks for looking!

Click here to order Stampin' Up! supplies 24/7! remember for every $50 you spend you get to choose a FREE Sale-A-Bration product from the SAB catalog!


Saturday, December 25, 2010

From Our House to Yours...


I hope you are having a great holiday!
(I designed our Christmas card in My Digital Studio this year and it was o-so-easy and fun to do!)

Merry Christmas!

Friday, December 24, 2010

Tri Fold Gift Card Holder


Here is a quick and easy gift card holder just in case you need an idea at the last minute! And really you could add any embellishment to it so it would not have to be Christmas-y at all!

This is the front view. The holly is punch art made using the 2" x 1 3/8" Oval Extra Large punch and the 3/4" circle punch and it was attatched to a "belly band" that fits snug around the gift card holder so the gift card will not fall out.

Here is what it looks like open. If you look really closely (at the middle section) you can see that there are three mini glue dots in a row and that is were the gift card would go.

The measurements for this gift card holder are: 11" x 2 1/2" and scored at 3 3/4" and 7 9/16". The belly band is: 6" x 1 1/4" and scored at 1 3/4" and 4 3/8".


Very simple, easy and great to make in a hurry!

Thanks for looking!

Thursday, December 16, 2010

Rudolph, Front and Center- SCIC32


It's Thursday and time for another Stampin' Celebration Inspiration Challenge! This challenge will be up for TWO WEEKS!! That is a lot if time to create something and share it with us! We have traditional Christmas Colors to work with in these fun inspirational pictures.

I decided to use a stamp set I just got, Holiday Lineup. I have been wanting to get it for a while, but never did, until this year, I broke down and got it!

Here is what I came up with, very simple, but to the point. I stamped the reindeer onto watercolor paper using StazOn ink and then used the blender pens and classic inks to color with. Those cute little reindeer are so fun to watercolor, even though on this card I only did one in detail and washed the others with Crumb Cake ink.

Here is a close up of the reindeer and the sentiment. You can see I added googly eyes to Rudolph and then crystal effects to his nose to make it shine! I stamped the sentiment on the Crumb Cake card base and then used a blender pen to trace the letters to give them a softer glowy-er look. I think it added a nice touch to the card.

Again you have TWO WEEKS (until the 28th) to create something that was inspired by the inspiration pictures above!

Thanks for looking!